
Here we’ll talk about fixing the headliner on sport-utility vehicles, cars and trucks. If there is a more aggravating automotive problem than a sagging headliner brushing the top of your head while you’re driving I have yet to discover it. Although this problem becomes more common on classic muscle cars from the 70s, I’ve seen five-year old automobiles experiencing headliner separation.
With that said, the first time I fixed the headliner myself was on a 1979 Special Edition Pontiac Trans Am. This brings me to the most common question about the problem. Car enthusiasts often wonder if fixing the headliner is a good do-it-yourself project or should they drop the car off at a trim shop.
Not only will we tackle this question, but we’ll supply some advice that allows you to use a combination of both methods. However, before we dive into the repairs let’s talk about the different types of headliners found in cars and trucks over the last 30 years. In addition, let’s cover what makes the headliners sag and what we can do about it so it doesn’t happen again.
Vintage types of Automotive Headliners
On classic automobiles from the 50s and 60s we find sewn fabric headliners. Interior trim technicians also referred to them as panel headliners. Large automobiles usually have 3 to 5 sewn fabric panels spanning the interior side of the roof. You can double that number on the station wagon or van. The factory sews these panels onto metal rods called bows. The metal rods snap into tracks that pull the fabric tight. It’s the spacing of the bows that provides the tension between the panels and holds them close to the underside of the roof.
When the headliner begins to sag on these classic cars it’s usually caused by one of two problems. Either the metal rods or tracks moved out of position or the fabric stretched. To resolve the problem and keep the automobile original looking, a trim shop replaces the fabric with the same material. If you are looking for a DIY alternative they offer replacement pre sewn headliner kits for classic cars. Since they’re designed for specific vehicles, do-it-yourself installation is a snap.
Muscle Car Headliners

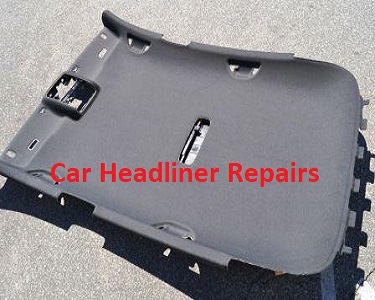
In the late 1960s automotive manufacturers changed over from the sewn panel headliners to a one-piece fiberglass shell type headliners. Car makers continue to use a variation of this design today. However, these are also called backer board type. A lot of thought went into switching to the new style. Car designers wanted to lower the roof line to improve aerodynamics. However, this meant sacrificing headroom inside the automobile.
The use of a fiberglass shell allowed the fabric headliner to contour the inside surface of the roof. This provided the maximum amount of headroom. In this type of system they mold the backer board shell and then cover it with a foam backed material. It’s often the combination of glue and foam that fail, allowing the headliner to sag. They use this type of system, because it provides an extra layer of noise control and outside temperature insulation for the interior.
Think of it like insulation for your attic. Unfortunately, if you consider how much heat the headliner becomes exposed to, you can see why they fail. The top side of the roof can reach temperatures over 100 degrees. In the Arizona desert, a black automobile roof can reach temperatures over 150 degrees. We’ll talk more about how we can mitigate this heat in the fixing the headliner yourself section below.
Options for Fixing the Headliner

Fixing the headliner in your driveway may seem like an attractive option. Removing the shell isn’t that difficult. You can consult your auto repair manual for exact step-by-step instructions. The old headliner is already falling off.
However, the new headliner will not stick to the fiberglass shell unless you clean every bit of glue and foam from the backer board. This is harder than it sounds. Even when you use specialized solvents it’s a time-consuming process. The bad part of a do-it-yourself repair on the headliner is when it doesn’t last and you’re forced to redo it several times.
Dropping the car off at the interior trim shop is the most expensive way of fixing the headliner. How much this operation will cost you really depends on where in the country you live and the type of automobile in need of repair. With that said, trim shops often charge between $200 and $500. Some of this cost is the labor involved in removing the headliner shell from the automobile.
This is when you can jump in and use your do-it-yourself auto repair skills. You can remove the headliner and transport it to the trim shop in the back of your friends Ford F150 pickup truck. This saves you downtime without your automobile. It also reduces repair expenses and keeps you involved in the process.
Stopping the Headliner from Sagging

As we discussed in the first section the most common cause for a headliner to sag remains exposure to extreme temperatures. Of course, storing the automobile in the garage and finding shady parking spaces whenever possible helps a lot. However, in reality, if you live in a sunny location of the world you won’t be able to avoid the sun altogether.
There is an opportunity when we have the headliner removed for repair to improve the situation. And this is to insulate the inside surface of the roof before we reinstall the headliner. They make a self adhesive material called Dynamat. Use this type of product to reduce the amount of heat and noise transferred to the interior compartment of the automobile. How long this extends the life of the headliner again depends on the amount of sun the roof remains exposed to. It also hinges on the quality of the repair provided by a well-trained interior trim specialist.
